Pixel Finder by Value(DN)

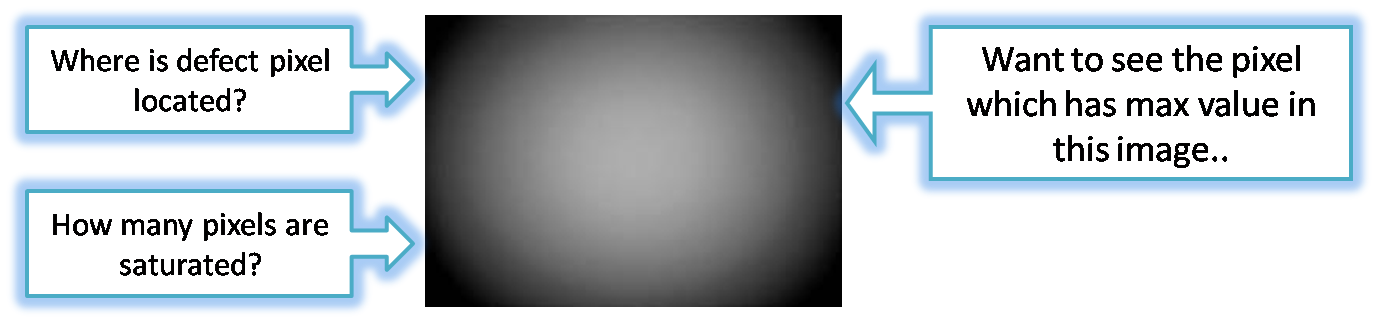
In many scenarios, especially in tasks like hot or defect pixel analysis, users need to investigate specific pixel values with precision. However, navigating to exact pixel locations using only zoom and scroll mechanisms can be cumbersome and inefficient, particularly when dealing with high-resolution images. This limitation underscores the need for more direct navigation tools
Additionally, in many scenarios, users need to quickly switch between multiple pixel locations to efficiently analyze various defect patterns or anomalies.

-
Find pixels based on a combination of color channel values.
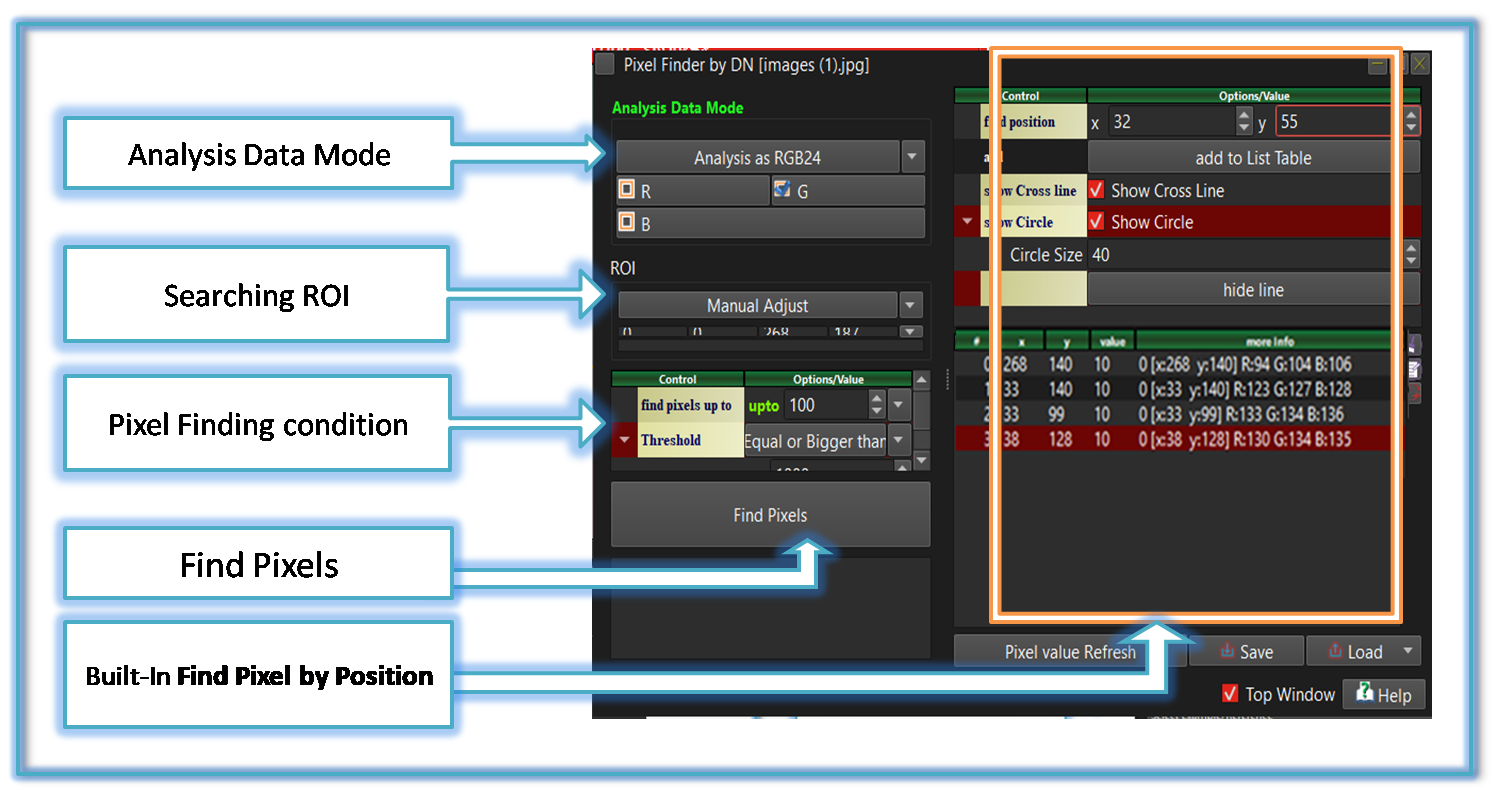
The user can find pixels based on a combination of color channel values, supporting both RGB24 and Bayer raw formats. ->[Analysis_Data_Mode]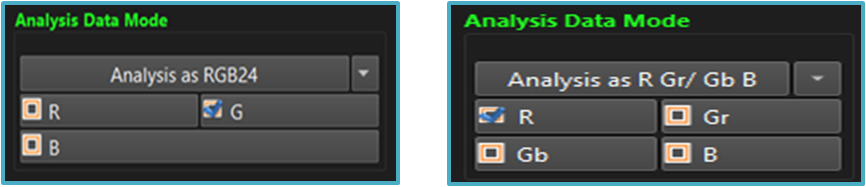
-
Find pixels within a specific ROI-based area.
This function enables users to efficiently locate pixels within a specific region of interest (ROI). By defining a targeted area, users can identify and analyze pixel values within that region with precision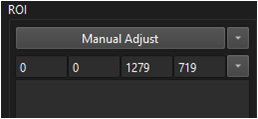
-
Highly Adaptive Search Criteria for Precision Pixel Detection
This feature provides a highly flexible method for identifying and selecting pixels based on dynamic search conditions.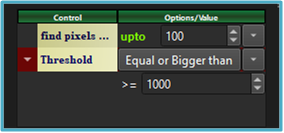
-
Built-in Find Pixel by position
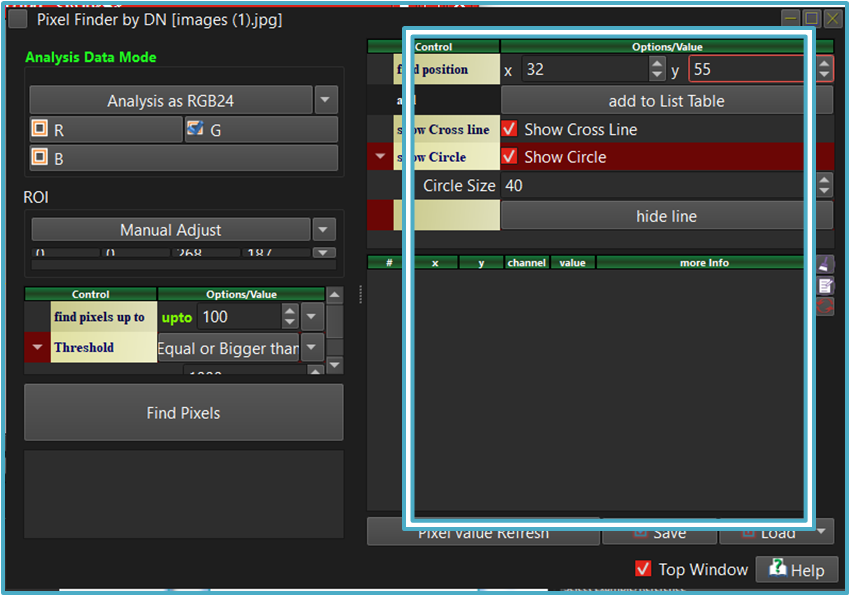


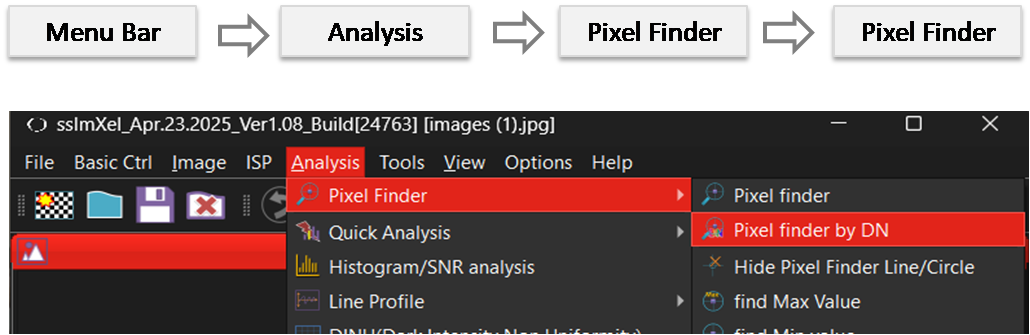
By selecting the menu options in the order shown in the image above or by choosing the toolbar icon
 , the PixelFinderDN dialog box will be showed up as shown in below picture.
For a more detailed explanation of the toolbar button or how to configure toolbar,please refer to configure toolbar
, the PixelFinderDN dialog box will be showed up as shown in below picture.
For a more detailed explanation of the toolbar button or how to configure toolbar,please refer to configure toolbar
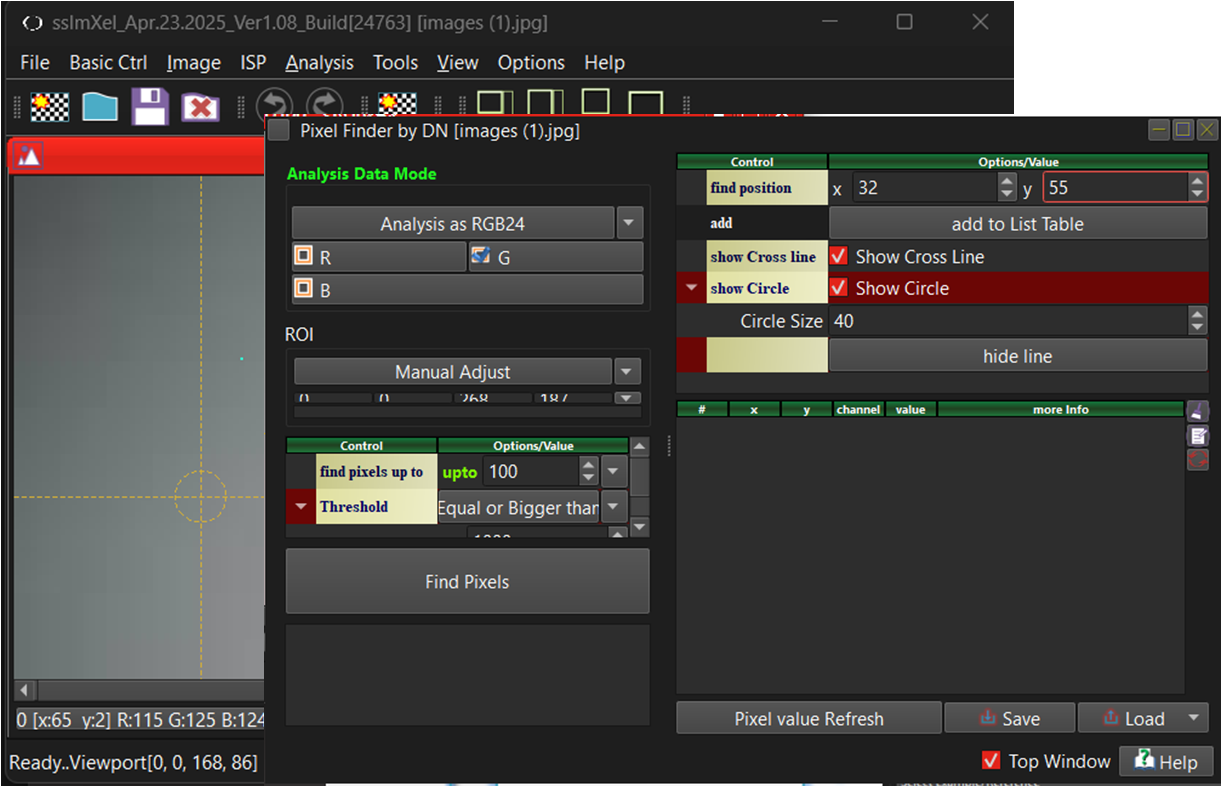
n

-
Analysis_Data_Mode
This control allows the user to select specific channels for analysis. For Bayer raw images, the analysis can be performed in either Bayer raw mode or RGB24 mode. Within each mode, the user can further select the desired color or pattern channels for analysis.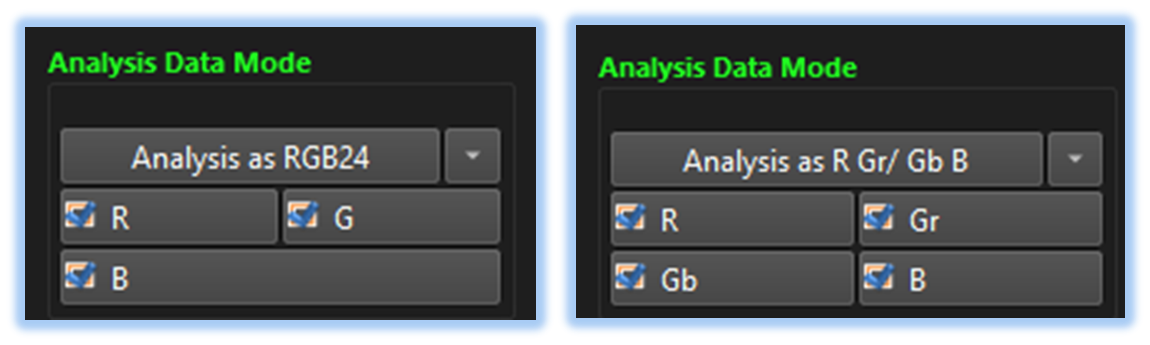
-
ROI
By allowing users to specify a Region of Interest (ROI) in addition to analyzing the entire image, the analysis speed can be increased, and the accuracy of the analysis can be improved by focusing only on the areas of interest.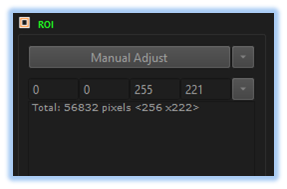
-
Local Range:
If this value is increased, the resulting image will have more shading while preserving high-frequency components. Conversely, if the value is decreased, the image will appear flatter but will lose high-frequency details. -
Apply or Cancel:
Once the user has adjusted all parameter values, they can click the 'Make Image Flatten' button. The tool will then process the image flattening, allowing the user to view the applied changes. and if the user clicks the cancel button, the Image flatter control dialog will be closed without applying any changes to the image.
| Control | Function description |
|---|---|
| Analysis | Allows users to choose which combination of the three colors are analyzed by toggling them with checkboxes |
| Region of Interest (ROI) | Specifies the rectangular region where the analysis is performed by inputting the XY values of the upper left vertex and lower right vertex of the region. Users can find a dropdown of pre-established regions by clicking on the arrow next to the at the right |
| Find pixel up to | Specifies the maximum number of pixels to find that fulfill the criteria given |
| Threshold | Inputs the criteria for which pixels will be located. Equal or smaller than(<=): Finds all pixels with color values less than or equal to the numerical value inputted Equal (==): Finds all pixels with color values equal to the numerical value inputted Equal or bigger than(>=):Finds all pixels with colors values greater than or equal to the numerical value inputted Range(~): Finds all pixels with color values within the two values inputted |
| DoCal | Runs the pixel finder with the given criteria |

Below demo demonstrates PixelFinderDN
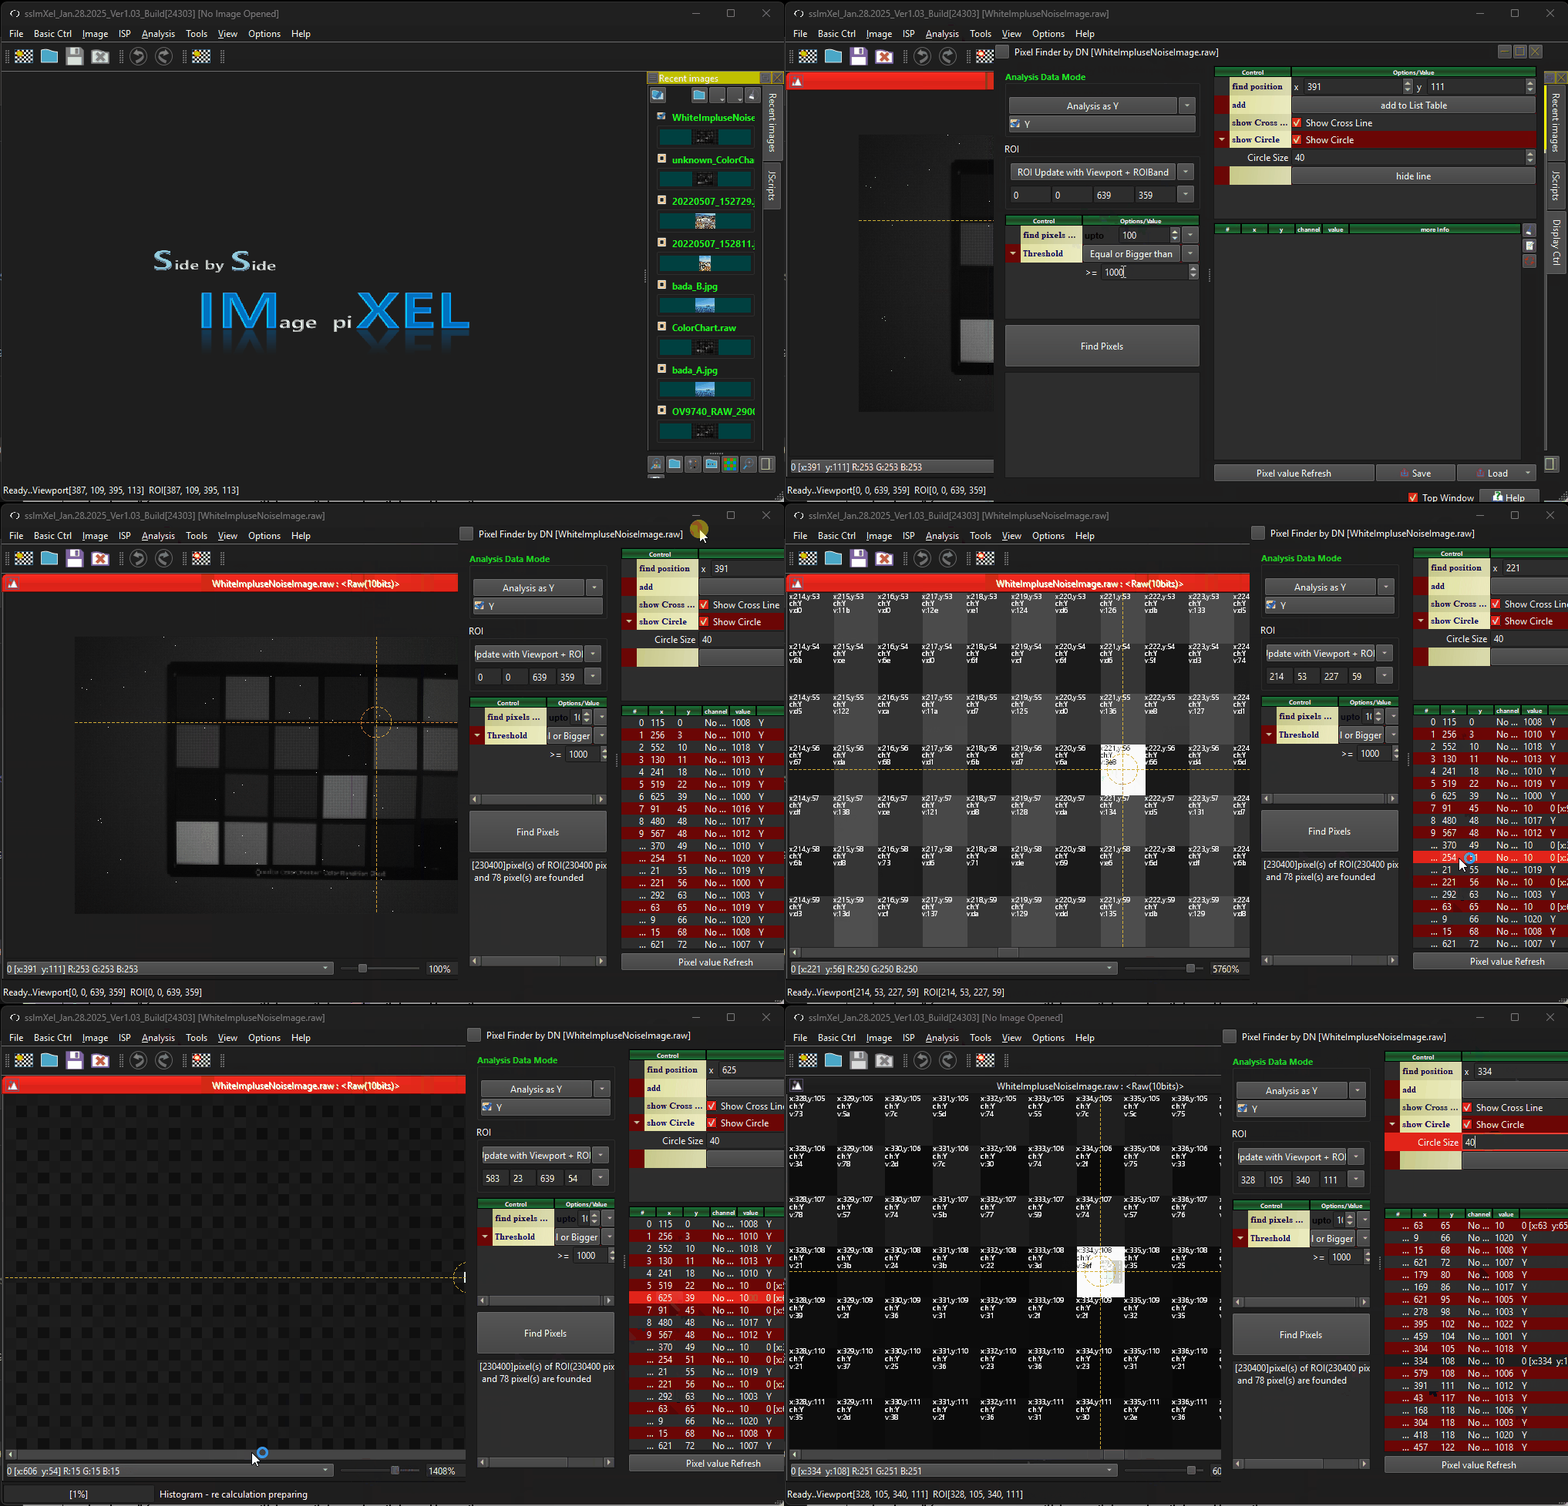 .
.